Adrienne's building
Shaw area
Washington, DC

Tile inlays Tiles are first glued to paper
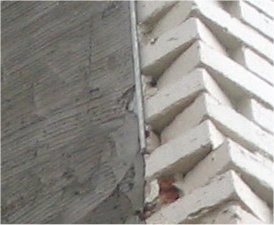
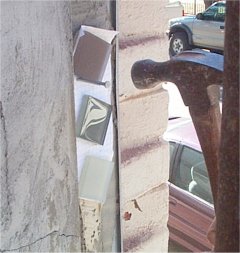
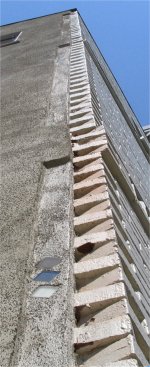
Tile inlays are positioned about a third of the way
down each recess groove, drawing attention
upward. On third of the way down allows a nice random appearance instead of centered.
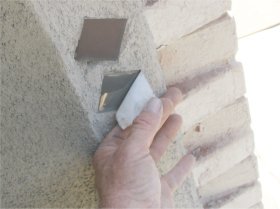
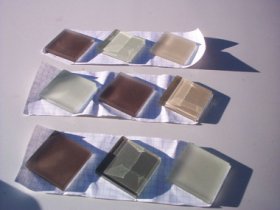
ABOVE: Tiles are first glued to paper. Tiles 
are set at a 30 degree angle with colors  randomized.


1/4" plaster stop Grooves are formed by nailing on one by four
First, 1/4" plaster stop is put on where the grooves go. Scratch coat is put on
wall.
The edge of the plaster stop is covered 
later with the finish coat. Won't this chip and fall off? No, I have a secret. E mail me, and I'll tell you the secret.
Grooves are formed by nailing on one by fours. After wall is filled, the one by is removed leaving a 3/4" groove. Edge of wall where the groove isn't, is formed with a 2 by four.


Grooves start and stop below the ornate brick bands one by fours are removed
Grooves start and stop below the ornate brick bands. After brown coat sets overnight, one by fours are removed, revealing grooves. Bottom of picture shows where one by four is removed,
awaiting finish coat.
Tiles are glued to the recess Here tape is peeled off
Tiles are glued to the recess using liquid nails.
A nail is driven to support the tile until the glue sets up.
Tiles are covered with tape. until groove is color coated. The finish mortar partially covers the edge of the tile, securing the tile permanantly in place. Here tape is peeled off.
The result is a decoratively unique signature
on this building.

 
old parging is stripped off Painted bricks are chipped up
Here old parging is stripped off using electric chipping hammers. Painted bricks are chipped up providing
a good bond for the new mortar.
before after
Two dramatic before and after pictures.
You may have visited Adrienne's building in past updates. If not please click here, here, or here.