>
Stucco by the competition rots house in Arlington, VA
Poorly done thin stucco with a synthetic finish causes severe rot and damage to this 4 year old custom home in Arlington, Virginia
Finished wall. The people who put on the stuff we tore off claimed it was real stucco. It is really called one coat "stucco", which has a thin basecoat and a synthetic finish. We put the good stuff on.

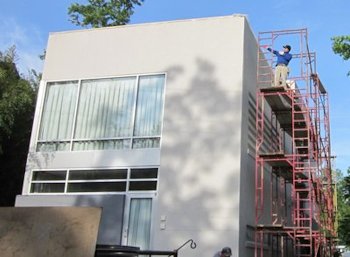
The front is finished. The front should last longer this time.
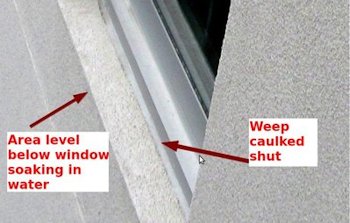
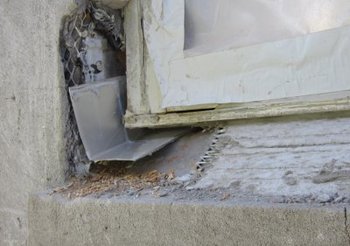
Note how the area below the window is level, and not sloped away, allowing water to soak in. All that is underneath is a flimsy piece of tyvek. Note also how the weep on the window is sealed with caulk.
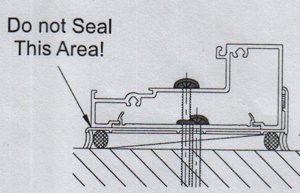
The weep groove under the window was caulked shut. I see this done a lot. I hope someone will read these instructions and stop filling in the weeps with caulk.
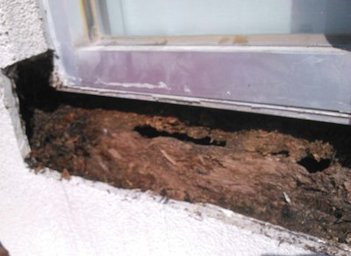
A view of the rot under the windows after 4 years.
People who do this kind of work: You aren't stucco contractors. This isn't stucco. Why not just stick to EIFS garbage where you belong and quit lying to the public.
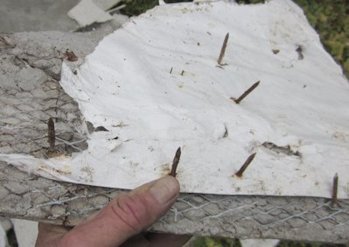
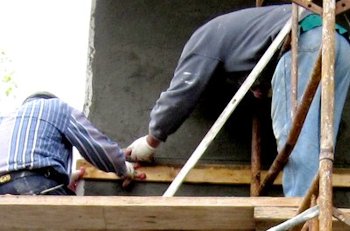
These Nails are too long. Using 2 inch nails risks hitting a wire or a pipe, which go through the center of the studs. Nails should be a maximum of 1 1/2", one inch and a quarter is the norm. The Tyvek was ripped up real bad by the nails and leaking. The Tyvek we pulled off was brittle, like old newspaper. My competition also used flat lath, instead of self furring lath.
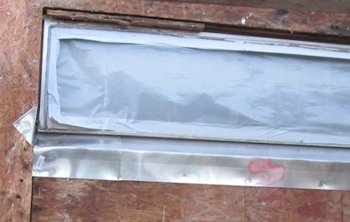
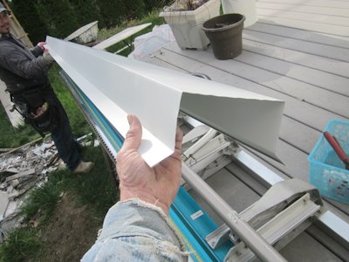
After cutting under the window at an angle we tucked aluminum flashing in. Note how the sides return up to prevent leaking at the corners. We also replaced the rotted OSB.

Note how the flashing goes way up under the window. The flashing is overlapped and under lapped with 2 layers of tarpaper.
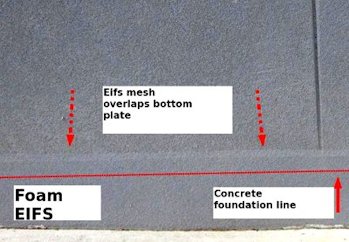
Plan for severe rot is sealing the bottom with foam EIFS. The lying crooks didn't know how to bond mortar to concrete so they stuck on EIFS.
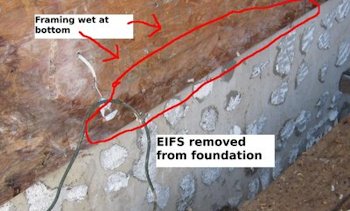
The bottom of the framing is what holds the whole house up. The water that penetrated the wall ran downhill and was trapped between the concrete and the bottom plate, the 2X4 that runs horizontally at the bottom.
We put on one layer of tar paper, put on the decorative reglet, and put on a second layer of tar paper from the bottom up, overlapping the top flange of the reglet.

My foot points to the weep screed, which allows water to drain out of the bottom of the wall. If you have visited my site before, you have seen weep screeds. The top flange of the weep is overlapped with tar paper and covered with self furring metal lath. The dimples on the lath hold the lath out from the wall allowing the mortar to squish behind the lath real good. The competition used flat lath.
More about self furring metal lath here:
We formed a sill at the bottom of the wall using solid cement mortar. The sill provides a drip edge, extending the life of the stucco. Less water running down the stucco the longer it lasts. How do you think the Grand Canyon got there ? The top of the sill has a steep angle for good water run off. The competition doesn't know that water runs downhill
We duplicated the control joints by scoring the brown coat with a concrete groover. These don't leak like the metal joints.
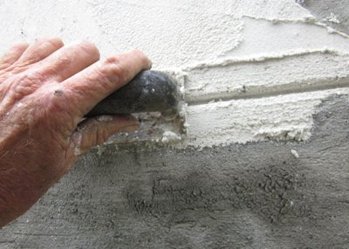
We grooved the finish. I love this cheap concrete groover. It works better than my fancy bronze groover.
As an afterthought, We cut out the brown coat around the window and put in and end dam, a stiff piece of aluminum that extends all the way past the corner of the window on the inside.
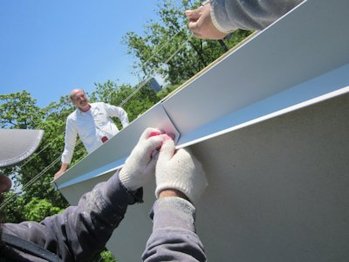
A metal brake is used to make the coping. The original house didn't have a coping at all, believe it or not.
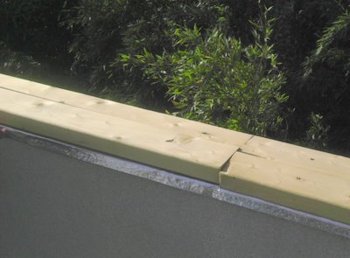
Nailers for the coping are 2 by 4's that are put on flush with the finished wall. These were screwed down, instead of nailed down, to avoid beating and banging that could crack the stucco.